Blog – Right Sidebar

BREAD AND BUTTER PUDDING

by January 30, 2020

Bread and Butter Pudding is a favourite in my house.  It is a very old fashioned dessert and very comforting on these cold winter nights.  I was given a couple of Panettones for Christmas and was wondering what to do with them, so decided that Panettone would make a delicious bread to use in the pudding.  In the past I have used Brioche which works very well, or just plain white bread also works and is what would have been used by my Grandmother and Mother when they made it.


I have been making it for so long that I do not use measurements, so this is a rough guide in terms of quantities of ingredients.  To be honest I find it does not have to be exact, just make sure your custard mixture is not too milky or it will have trouble setting.


I made a large one as I wanted to use up the bread and also it keeps well and is good the next day, either cold or heated up.


I have never made it with non dairy milk, but I do not see why you couldn’t although as you are using butter if you are strictly dairy free then you will not be making this anyway!!


I only add a little sugar to the Custard mixture as the Jam is sweet as is the Panettone or Brioche bread (if you are using that).  You can leave out the Jam, but I think it makes it tastier to add it in.


  • 6 eggs
  • Caster Sugar – approx 2 tablespoons
  • Vanilla Extract – approx 2 teaspoons
  • Milk – approx 750 mls
  • Sliced Bread – 1/3rd large panettone
  • Butter
  • Apricot Jam


Preheat your oven to 150 degrees.


Butter the sliced Bread and also spread with Apricot Jam.


Layer the Buttered and Jammed Bread into your oven proof dish.


Put the Eggs, Milk, Sugar and Vanilla Essence into  a bowl and using an electric or hand held beater whizz up really well.


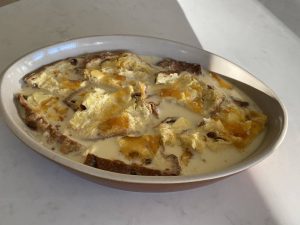
Pour the Egg mixture over the Bread and push it down into the Egg mixture so it is able to soak up some of the mixture.


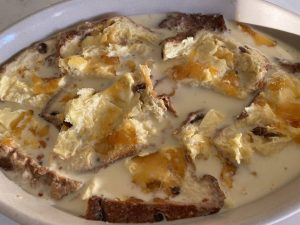
Place into the middle of the oven for approximately 1 hour until the Egg mixture is cooked.  It will be puffed up and looking delicious.


ROAST CAULIFLOWER WITH TOMATO SAUCE

by November 14, 2019

My Father in Law dropped in a recipe booklet (Dinner No2)  from the Guardian for me and I really like some of the recipes in it.  So far I have made the Tarka Dal and this Roast Cauliflower.  As always I slightly change the recipe to suit our taste buds, so this is how I made it.

It looked vey impressive on serving, so would be great for a dinner party!!

I served it with some Grilled Salmon for my Pescatarian Daugther and with some Marinated Lamb Cutlets for the rest of us.  The Marinade for the Salmon was some Lemon Juice, Crushed Garlic, Ground Black Pepper and a little bit of Olive Oil.  The Marinade for the Lamb Cutlets was the same with the addition of Rosemary, which is complemented by the Rosemary in the Tomato Sauce for the Cauliflower.  I cooked the Lamb Cutlets on a griddle pan and cooked the Salmon under the grill.

  • 2 Organic Cauliflowers   –  medium size  –  cut the bottoms off with most of the leaves
  • 4 tablespoons of Olive Oil for the Tomato Sauce
  • 3 tablespoons Olive Oil for the Cauliflower
  • 6 Garlic cloves  –  peeled and crushed
  • 1 tin Anchovy Fillets –  drained  (leave these out if you want to make this Vegetarian/Vegan)
  • Some sprigs of Rosemary
  • 2 Lemons   –  Finely zest them, and then juice them to get 4 tablespoons of Lemon Juice
  • 2 tins of Chopped Tomatoes  (check label for just Tomatoes and Tomato Juice)
  • Sea Salt and Ground Black Pepper

Heat the Oven to 240 degrees.

Bring a large saucepan of water to boil and once it is boiling add the two cauliflowers.  Boil for 8 minutes then drain and leave to dry in a colander, floret side down for at least 10 minutes.


Rub the drained Caulflower all over the top with Olive Oil, and sprinkle with Sea Salt and Ground Black Pepper.

Roast on a baking tray for 30 minutes, or until nicely browned on top. 


Whilst the Cauliflower is in the oven, make the Tomato Sauce:


Heat the Olive Oil in a large saucepan and fry the Garlic and Anchovies until the Garlic is golden and the Anchovies have begun to break down.  Keep an eye on them, you want the Garlic golden but not burnt and Garlic can burn quite quickly!


Stir in the the Rosemary, grated Lemon Zest, Tomatoes and 4 tablespoons of Lemon Juice.

Bring to a boil and then turn down and simmer gently for 20 minutes.  I like lots of sauce, so I did not let it thicken too much.

Season with Sea Salt and Ground Black Pepper to taste.


Serve with Rice, Meat of Choice or as part of a larger selection of dishes.


This Tomato Sauce is really delicious and would be lovely as a pasta sauce or as a sauce for other Vegetables, Fish or Chicken.

It would freeze well too!


The Lamb and Salmon Marinating:

FISH CHOWDER – DAIRY AND GLUTEN FREE

by November 13, 2019

My challenge was to make a Fish Chowder which was delicous but Dairy and Gluten Free,  still keeping that rich creamy consistency.

I am delighted with this Chowder, it is delicious and creamy but also at the same time light.

This reheats perfectly as long as you do it gently.  It is perfect for a flask for school or office lunches.

  • 2 large Onions  –  peeled and finely diced
  • 3 cloves of Garlic  –  peeled and crushed
  • 3 Organic Leeks  –  finely sliced
  • 4 medium Potatoes  –  peeled and cut into medium sized chunks
  • 2 small tins of Organic Sweet Corn  –  one can blitzed into a puree and other kernals left whole
  • 1 large piece of Cod  –  skin removed and cut into resonable sized chunks
  • Water and 2 teaspoons of good quality Vegetable Stock Powder (or enough Vegetable stock to cover the vegetables in the pot)
  • Knob of Coconut Oil
  • 1 small tin of Coconut Cream
  • Sea Salt and Ground Black Pepper
  • Chopped Parsley for serving

Don’t cut the Potatoes and Cod too small or it will disappear into mush in the Chowder!


Place the Coconut Oil into a large saucepan and melt.  Add the Onions and saute for a few minutes with the lid on, stiring every now and again.   (do not let them get brown).

Add the Garlic and the Leeks and saute for another few minutes, as above.

Add the diced Potatoes and again saute for approximately 4 minutes as above.

Top these sauted vegetables with Water and Stock Powder (or Stock) until just covered and bring to the boil.  Reduce heat to a very gentle simmer and cook until the potaotes are cooked though.

Add the pureed Sweetcorn and stir through.  This thickens the soup nicely.

Add the whole Sweetcorn kernals and stir through.

Add the diced Cod and stir through.

Add the can of Coconut Cream and stir through.

Once you have added the Coconut Cream do not let the Chowder come to the boil or it may split.  Just simmer very gently until the Cod is just cooked through (it will not take very long).  Add Sea Salt and Ground Black Pepper to taste.


The Chowder is now ready to serve.

Top with some chopped fresh Parsley!!!

QUICK AND EASY SALSA

by November 12, 2019

This is the Salsa I made to go with my Vegetarian Chilli Bowl.

This Salsa is very easy and quick to make with none of the fine chopping involved with making Salsa Fresca (fresh diced tomatoes etc).

You do need a food processor or blender though.

  • 2 tins Chopped Tomatoes  (check the label to make sure they are just Tomatoes and Tomato Juice no nasty extras)
  • 4 Cloves of Garlic  –  peeled
  • 1 Onion  –  peeled and chopped into quarters
  • 2 Jalapeno Chillis (or other green chillis  –  but check heat first as you cannot take the heat out if it is too spicy)
  • 1/2 Tablespoon of Honey
  • 1 cup Coriander Leaves
  • 1/4 teaspoon of Sea Salt
  • Juice from 1 Lime


Add the Onion, Garlic and Jalapeno Chillies to the food processor.  Pulse to chop them so they are small but not a puree.

Add the Tomatoes and pulse again.

Add the Honey, Salt, Lime Juice and Coriander Leaves and Pulse again.

Keep pulsing until the salsa is as chopped as you like it, being careful not to make it into a puree.

This keeps very well in the fridge for a few days (if it lasts that long!)

VEGETARIAN CHILLI BOWL

by November 8, 2019

A super tasty and easy Vegetarian Chilli recipe which you can use in a Chilli Bowl or a Burrito.

  • 1 Onion – diced
  • 4 Garlic Cloves – peeled and crushed
  • 3 Red Peppers  –  sliced into strips
  • 2 tins Chopped Tomatoes
  • 4 tablespoons of Tomato Paste
  • 2 tins of Black Beans – drained and rinsed in cold running water
  • 2 teaspoons of Ground Cumin
  • 1 teaspoon of Paprika
  • 2 Bay Leaves
  • 2 teaspoons of dried Oregano
  • 1/2 teaspoon of dried Thyme
  • 2 teaspoons of Chilli Powder
  • 1/2 cup Vegetable Stock
  • 2 teaspoons of Coconut Oil
  • Sea Salt and Ground Black Pepper to taste

Melt the Coconut Oil in a frypan with a lid and saute the Onion until it is soft.  Add the Crushed Garlic and saute again for a minute or two.

Add the Pepper strips and the Vegetable Stock and let it simmer for 5 minutes.

Add the Chopped Tomatoes, Black Beans, Tomato Paste, Bay Leaves, Ground Cumin, Paprika, Dried Oregano, Dried Thyme, Chilli Powder and some Salt and Ground Black Pepper.


Bring to a simmer and let it cook for 15 minutes until it is nice and thick and saucy.  Depending how juicy your tomatoes were you might need to put on the lid to almost fully cover the frypan so it does not evaporate too quickly.  You want to end up with a lovely thick and juicy consistency.  Not too wet but not too dry either.


I served this with Salsa, Guacamole, Brown Rice and Shredded Lettuce.


The left overs I portioned and froze for future school lunches !


SCHOOL LUNCHES

by November 8, 2019

Here are a couple of easy and tasty School Lunches which I gave my daughter this week.  Both lunches are Gluten and Dairy Free.

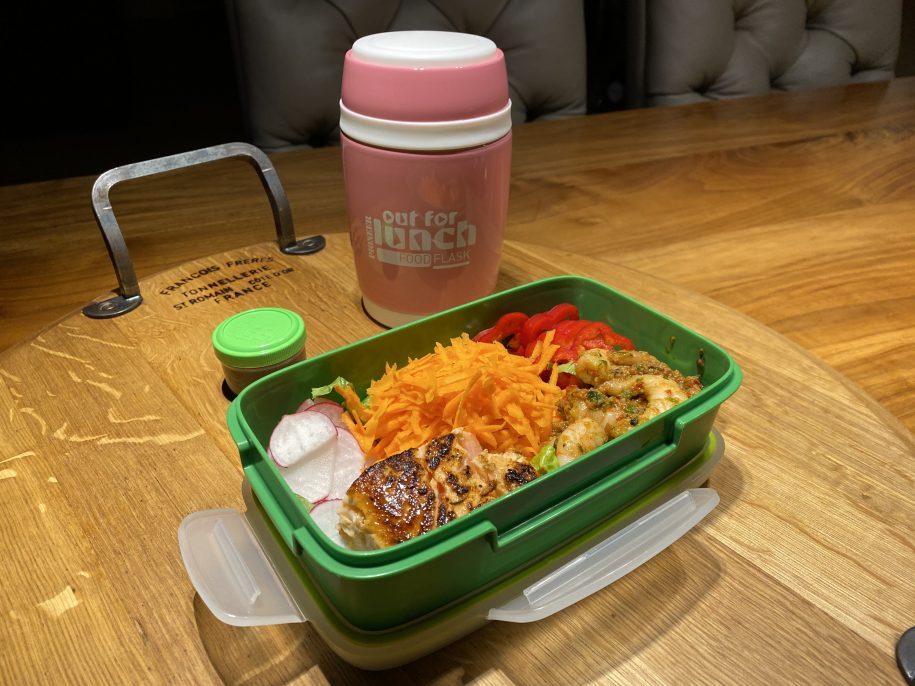
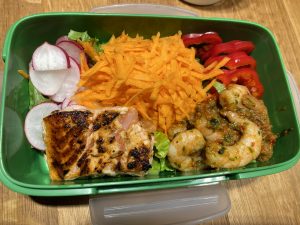
Firstly a salad with chopped Lettuce, sliced Radish, sliced Red Pepper, grated Carrot and left over Grilled Salmon and Chilli and Coriander Prawns from last nights dinner.

In a separate little pot I put some Balsamic and Olive Oil Dressing so she could add it at lunch time and the salad would not go soggy.

Together with a flask of my Roasted Carrot and Coriander Soup, this lunch is warming and full of goodness.


I always add lots of color to my salads, as we try to “Eat the Rainbow”.  This means we get lots of different nutrients into us as each different colored vegetable has its own particular benefits.

I love using up leftovers from last nights dinners to make lunch the next day.  It saves a lot of time and energy.


This second lunch was Vegetarian/Vegan pasta which could either be served hot or cold.


This is simply Gluten Free pasta cooked and then coated in Red Pesto and with some Sun Dried Tomatoes added.

Tomatoes are an excellent source of Vitamins C, A and E.  They are also an excellent source of the phytonutrient Lycopene which is a potent antioxidant.


This Super Red Pesto by Veggie Earth is very tasty and excellent if you need to be Gluten or Dairy Free.  This is what I used for this lunch box Pasta.


Subscribe to our newsletter

Lorem ipsum dolor sit amet, consectetur adipiscing elit. Proin porttitor nisl nec ex consectetur, quis ornare sem molestie. 

Error: Contact form not found.

    Cart