Blog – Right Sidebar

PUMPKIN PIE

by November 10, 2021

Getting into the Halloween spirit I decided to make Pumpkin Pie.  I like this recipe as it is not too sweet and has a hint of spice but not overpowering.  And the Pastry is delicious and easy to work with.  Use Gluten Free Flours if you want a gluten free pastry.

PASTRY:

  • 1 cup Plain Flour
  • 1/4 cup Self Raising Flour
  • 2 tablespoons Cornflour
  • 2 tablespoons Icing Sugar
  • 125g Butter – Chopped
  • 2 tablespoons Water (but more may be needed to bring it together – go slowly)

FILLING:

  • 2 Eggs
  • 1/4 cup Brown Sugar
  • 2 tablespoons Maple Syrup
  • 1 cup cooked pureed Mashed Pumpkin (no lumps)
  • 2/3 cup Evaporated Milk
  • 1 teaspoon ground Cinnamon
  • 1/2 teaspoon ground Nutmeg
  • pinch ground Allspice

PASTRY:

Sift all Flours and Sugar into the bowl of your food processor.

Pulse in the Butter so it looks like coarse breadcrumbs.

Add enough water to make the Pastry cling together, pulsing until just combined.

Press the Pastry into a ball, knead gently on a floured surface and then cover and refrigerate for 30 minutes.

THEN:

Preheat oven to 200 degrees.

Roll Pastry on a floured surface until large enough to line a 23cm pie dish.

Lift Pastry onto the pie dish and ease it into the sides.  Trim the edge.

Using the left over Pasty, make a double edge to the Pie crust, trim again and decorate the edge by pinching it between your fingers.

Place Pie dish on to an oven tray, line Pastry with baking paper and fill with baking/dried beans and bake for 10 minutes.

Remove paper and beans and bake for a further 10 minutes or until lightly browned.

Leave to cool.


FILLING:

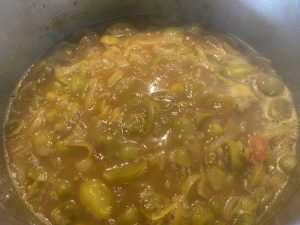
Beat Eggs, Sugar and Maple Syrup in a small bowl with electric beaters until thick.  Stir in the Pumpkin, Milk and Spices.

Turn oven down to 180 degrees.


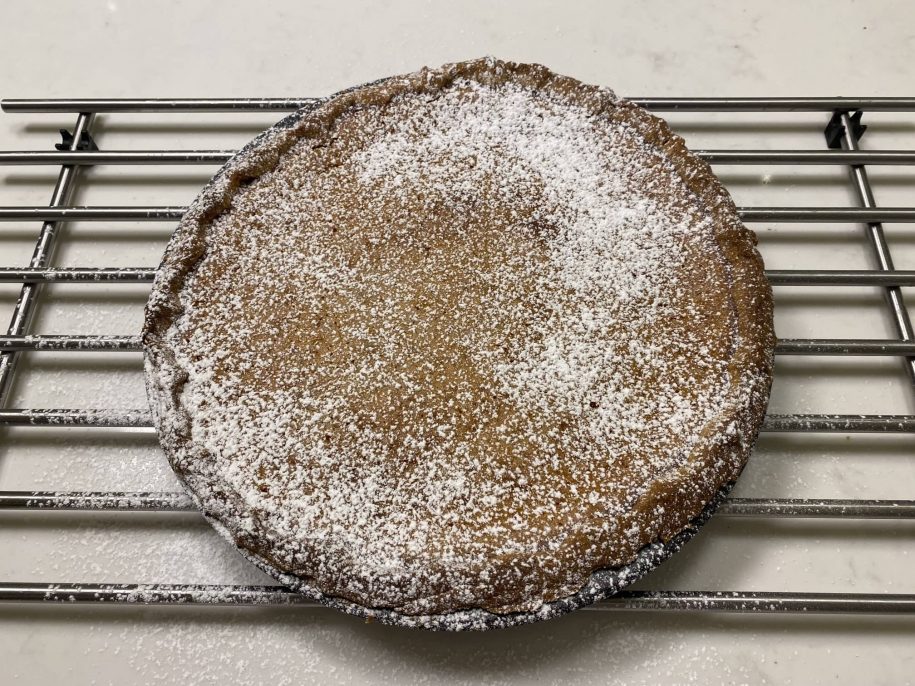
Pour filling into Pastry Case and bake in oven for 50 minutes, or until filling is set.

Cool.

Dust with sifted Icing Sugar.


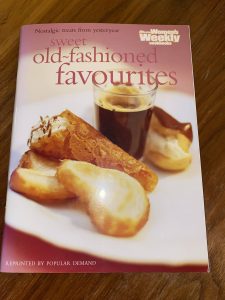
The recipe is out of The Australian Women’s Weekly’s Sweet Old Fashioned Favourites (I made slight changes).

I love the Australian Women’s Weekly cookbooks, the recipes are always easy to follow and are good for basic recipes in each genre.

PERSIAN HERB RICE

by November 3, 2021

I made this Rice dish to go with the Spiced Lamb and Apricot Stew and it was really delicious.  Everyone who ate it specifically commented on how delicious it was.  It was quite time consuming compared to the Stew but it was worth it.  The crunchy base really added a lovely texture.

It is from Persiana, Sabrina Ghayour’s book.  Even though it says it serves 4 – 6 I actually halved the recipe and it was more than enough for us and we had leftovers.  I will give the amounts I made and the procedure I used.  The baking paper tip was Sabrina’s and it was fantastic.

  • 250 g Basmati Rice
  • sea salt flakes
  • 50 g Coriander leaves
  • 50 g Flat Leaf Parsley leaves
  • 20 g Chives
  • 20 g Dill leaves
  • 65 g Spring Onions
  • Olive Oil
  • 75 g Butter cut into generous chunks


Wash the Rice in cold water in a large bowl, rinse and drain it.  Keep doing this until the water runs clear.

Cover the Rice with fresh cold water, add some sea salt flakes and leave it to soak for 2 – 3 hours.  (This really makes a difference to the length of the rice and makes it look lovely).

Add your various herbs and your roughly chopped Spring Onions to a food processor and blitz until they are finely chopped.  Pulsing works well here as you don’t want a mush!

Boil your water, drain your Rice from the soaking water, and add it to the saucepan of boiling water, along with some Sea Salt and the chopped Herb and Spring Onion mixture.

Stir well and boil for 7 minutes.

Drain the Herby Rice in a colander and put aside.

Line your saucepan with baking paper to prevent the Rice from sticking to the base of the pan.  This worked really well.  Screw up the paper before smoothing it out again and it is easy to keep in place in the bottom of the pan.

Return your saucepan to the hob and pour in some Olive Oil with approximately 1/2 of the butter chunks on top of the baking paper.  Season with Sea Salt.

Scatter the Rice mixture into the saucepan a spoonful at a time.  You do not want to pack it down, but keep it light and fluffy.

Add the remaining Butter knobs on top of the Rice.

Cover the saucepan with the lid wrapped in a tea towel to make a tight seal.

Cook the Rice on a medium high temperature for 8 minutes, then reduce the heat to low and cook for a further 25 to 30 minutes.  This high heat at the beginning gives this lovely crunchy brown bottom to the Rice.


Once the Rice is cooked, tip it out onto your serving plate, so you can see the beautiful brown base.  Mine came out of the saucepan really well due to the baking paper on the bottom.


I will definitely be making this Rice again !!!


SPICED LAMB AND APRICOT STEW

by November 2, 2021

This tasty stew is very quick and easy to prepare and even though it has very few ingredients it has plenty of flavour.

This is a recipe from another Sabrina Ghayour cookbook, Persiana, which I love.  I served this stew with Persian Herb Rice and Persian Flatbread.  Recipes for each I will put up later, but both also from Persiana.


  • Olive Oil
  • 2 large Onions, roughly diced
  • 800 kg diced boneless Lamb leg
  • 2 heaped teaspoons ground Cumin
  • 1 heaped teaspoon ground Cinnamon
  • 1 heaped teaspoon Turmeric
  • Sea Salt
  • 2 generous tablespoons clear Honey
  • 250g dried Apricots
  • Boiling Water


Preheat your wide casserole dish over a medium heat.

Drizzle enough Olive Oil to cover the base of the casserole dish and add the Onions, sautéing them until they begin to brown around the edges.

Add the Lamb to the pan, stirring the meat into the Onions.  Keep the Lamb moving so it becomes nicely browned rather than stewing.

Add the Spices to the pan, season with Salt, stir again until well combined.

Add the Honey and stir again.

Add enough Boiling Water to cover the ingredients, bring back to the boil, then reduce heat and simmer for 1 1/4 hours.  Stir every now and again to prevent sticking.

After it has cooked for the 1 1/4 hours, add the Apricots, stir well and cook again for another 45 minutes.


I made this earlier in the day as I think stews always taste better if left to sit for a while, so I reheated it for about 45 minutes before dinner and this also helped the sauce to thicken a little bit more.


This was enough for 6 people.


We served this with Persian Herb Rice which was absolutely delicious.


And Persian Flatbread.

This is the cookbook the recipes came from:   (Tiger likes this book too!)

CAULIFLOWER AND CUMIN SOUP

by November 1, 2021

Now that the weather is getting cooler, I just love a big bowl of nourishing soup to warm me up from the inside.  This soup is very simple but bursting with a delicious delicate flavour.   It is based on the recipe in Sabrina Ghayour’s book Simply.  I used greek yoghurt instead of double cream and then roasted some Cauliflower florets in a little bit of Chilli Oil to add to the soup for some texture.  I am giving the instructions for the soup I made.

  • 1 heaped tablespoon of Cumin Seeds (toasted and ground)
  • Olive Oil
  • 1 large Onion, roughly diced
  • 1 large Cauliflower, with leaves, cut into rough chunks
  • 1/2 Cauliflower cut into small florets
  • 1.5 litres of boiling water
  • 150 mls of Greek Yoghurt
  • Sea Salt and freshly Ground Pepper

Heat a large saucepan over a medium heat and drizzle in some Olive Oil.

Add the chopped Onion and Cauliflower chunks together with the Ground Cumin.

Season with Salt and Pepper

Pour in the boiling water, bring back to the boil and then turn down to a simmer and cook with the lid on for approx 25 minutes, or until the Cauliflower is cooked through.

In the meantime heat your oven to 200 degrees and place your small Cauliflower florets on a baking try and drizzle with a little Olive Oil.  Roast until they are lovely and brown in patches, turning them over half way through.  Mine took about 20 minutes.  I used Chilli Oil which I had to hand, but Olive Oil would be just as good.

Remove the soup from the heat once the Cauliflower is cooked.

Blend with a stick blender until nice and smooth.  Add in the yoghurt and stir well.  Check your seasoning.


Return to a very low heat and serve with the small roasted Cauliflower florets on top.

Enjoy !!!!


This the cookbook I got the recipe from.  I love her books, the recipes are so easy and very tasty.

BAKED OATS FOR BREAKFAST

by February 3, 2021

My daughter made me this for breakfast and it was really delicious.  It is a great way to incorporate some more protein into your breakfast as it has one egg in it.  It keeps really well in the fridge and we had it for breakfast the following day as well.  It is very easy and quick to make, so then you just put it in the oven for 35 minutes and it cooks whilst you are doing other things (like feeding the pets etc) and then your breaky is ready.

I served mine with chopped Strawberries, Pumpkin Seeds and Chia Seeds sprinkled over the top.

It is not sweet, so if you needed a sweeter kick, you could add some Maple Syrup drizzled over the top.

If you used Gluten Free Oats and Baking Powder, it will be Gluten Free.  It is Dairy Free and Vegetarian, so ticks lots of boxes!!!

You could add any nuts or fruit you like, this is the recipe my daughter made, but feel free to change it around as long as you keep the dry to wet ingredients ratio.  I was just thinking, I might try putting the mixture in muffin cases – I think that would work really well and they would be a great portable breakfast or snack.


  • 200 g Porridge Oats
  • 1 teaspoon Baking Powder
  • 35 g Almonds, roughly chopped
  • 1 Egg, beaten
  • 1 Banana, mashed
  • 600 mls Oat Milk
  • 1 teaspoon Vanilla Essence
  • 500 g mixed Berries (in this picture, Blueberries, Blackberries and Raspberries)


Preheat your oven to 200 degrees.

Mix the Oats, Baking Powder and Almonds together.


In another bowl, mix the beaten Egg, Oat Milk, Vanilla Essence and mashed Banana.

Add the mixed Berries.

Add the dry ingredients to the wet ingredients and mix well.

Pour into an oven proof dish and cook for 35 minutes.

If it is not very brown on top, you can turn on the grill for the last few minutes and just brown the top, but keep an eye on it as it browns quite quickly.

Serve with extra fruit, seeds, nuts or berries!!!  You can add a drizzle of honey or maple syrup if you want it to be a bit sweeter.


AUNTIE VERNA’S GREEN TOMATO PICKLES

by November 6, 2020


The last of my tomatoes and lots of green ones, so I made my Auntie Verna’s Green Tomato Pickles.  Being a family recipe handed down, the amounts are a bit vague!!!

.


  • 5 to 6 lbs Green Tomatoes – cut into chunks
  • 2 lbs Onions – halved and sliced
  • 2 tablespoons Plain Flour
  • 1 tablespoon Mustard Powder
  • 1 tablespoon Curry Powder
  • 1 tablespoon Tumeric
  • 1 cup Sugar
  • Sea Salt – handful
  • Malt Vinegar – approximately 3 litres


Place the chopped Tomatoes and Onions into a basin


Stand overnight with the handful of salt mixed through.  This will release a lot of juice.

The next day, drain the Tomato/Onion mix.

Put into a large saucepan and pour in the Vinegar – you want to almost cover the mix but not quite.


Boil for 1/4 hour.

Add all the dry ingredients together with some more vinegar and make a paste.

Mix into the Tomato/Onion mixture and boil for another 1/4 hour.


Spoon into sterilised jars and keep in a dark cool place.


This is delicious as an accompaniment for a strong cheddar cheese or for a Ploughman’s lunch.  Growing up we used to eat it by itself on toast!!

Subscribe to our newsletter

Lorem ipsum dolor sit amet, consectetur adipiscing elit. Proin porttitor nisl nec ex consectetur, quis ornare sem molestie. 

Error: Contact form not found.

    Cart