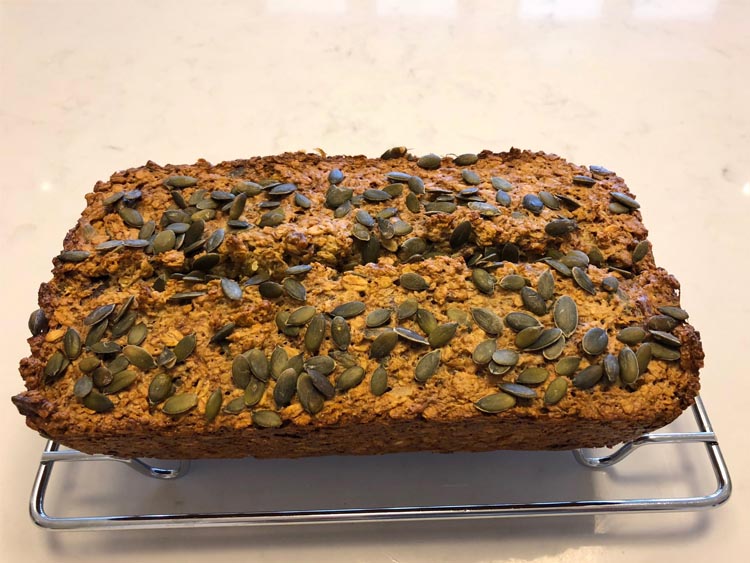
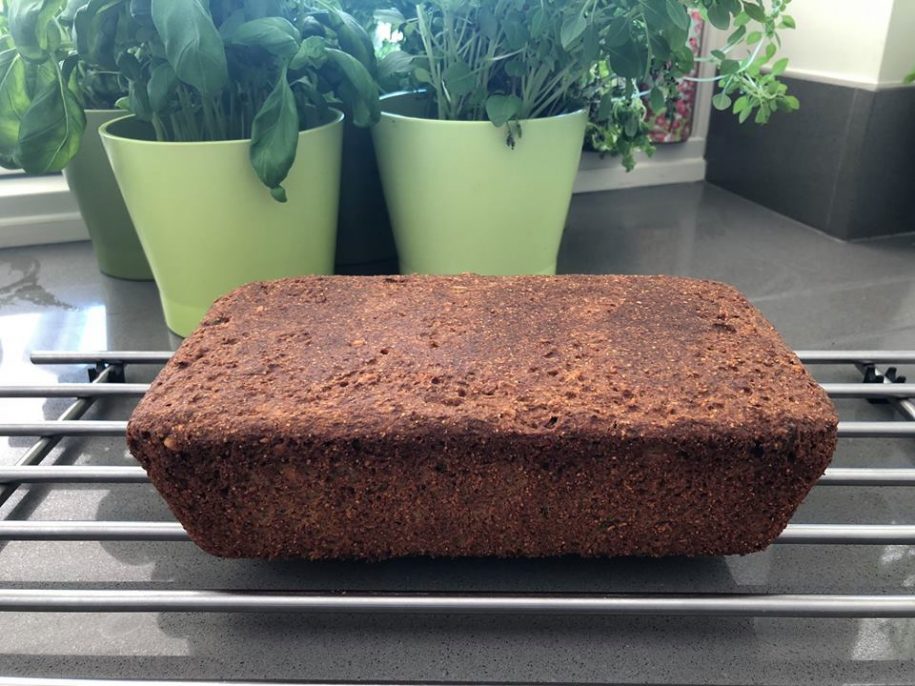
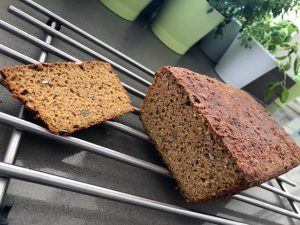
Blog – Right Sidebar

OAT BREAD

by May 9, 2018

Here is another “wheat free” bread recipe, this time made with oats. If you used gluten free oats, then this too would be a gluten free bread.

This bread is also full of “good for you” ingredients.

It is delicious fresh or toasted.

This bread is so easy to make and is really delicious. It is based on a recipe that my friend Nicole shared on her facebook page, “Rejuvenating Health with Nicole“.

Ingredients

  • 1 500g tub organic natural yoghurt
  • 360g porridge oats
  • 
1 egg
  • 3 – 4 tbsp coconut or almond milk
  • 
2 tsp bicarbonate of soda
  • 1/4 tsp salt
  • 
1 cup of nuts and seeds – I use walnuts and a mix of pumpkin, sunflower and sesame seeds

Method

  1. Preheat the oven to 180C. Grease a loaf tin (I use coconut oil) and line the bottom with non stick baking paper.
  2. In a mixing bowl combine the yoghurt, beaten egg, milk and bicarbonate of soda.
  3. Stir in the oats, salt and mixed nuts and seeds.
  4. Ensure all ingredients are well mixed and then put into the greased loaf tin.
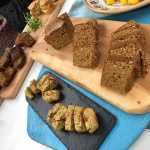
  5. Sprinkle a few extra seeds on top.
  6. Place in the oven and cook for 50 minutes (depending on your oven). It should be nice and brown on top.
  7. Remove loaf from the tin and return to oven upside down for 5 minutes to crisp the bottom and sides.
  8. Remove from oven and leave to cool.

Benefits of eating oats include

Oats are a rich source of dietary fibre which is very good for your digestive health. Importantly, oats contain beta-glucan a form of soluble dietary fibre which has been found to help lower cholesterol levels. Oats also have a low glycemic index which means that they are absorbed more slowly and this helps regulate blood sugar levels as well as making you feel satisfied for longer. Oats are a very good source of Magnesium, Manganese and Phosphorus and a good source of Biotin and Vitamin B1. They are also a good source of protein.

WHEAT FREE BREAD

by May 1, 2018

I am often asked about healthy alternatives to shop bought bread, so in todays post I am giving you the recipe for Gluten Free Brown Yeast Bread, which I learnt how to make in Maggie Lynch’s cooking class a few weeks ago. This bread is not only Gluten Free but also Wheat Free. Being Gluten Free it is suitable for people with Coeliac Disease. However, a lot of people I talk to are trying to reduce their consumption of wheat, not gluten. This may be because they feel they have an intolerance to it, or they just want to eat less wheat generally as part of an overall healthy lifestyle. So this bread is great for them also.

The beauty of this bread is that it is full of nutritious ingredients and it is also totally delicious!!! It has a lovely moist texture so is really good to use for an open sandwich, but it also toasts really well.

Don’t be put off by the use of yeast in the bread, it is very easy to make and even though you do have to leave it to rise, the actually making of the bread is quick enough to do (especially if you have put all your dry ingredients in a bag in the fridge ready to make the next batch, like I did last time I made it!!).

  • 190g brown rice flour
  • 50g millet flakes
  • 110g buckwheat flour
  • 25g psyllium husks
  • 1 level teaspoon baking powder (make sure you use Gluten Free if you are Coeliac!)
  • 1 teaspoon Himalayan salt
  • 50g seeds (mixture of pumpkin, sunflower and sesame)
  • 1 1/2 rounded teaspoon ground chia seeds
  • 2 teaspoons slightly rounded dried yeast
  • 2 tablespoons olive oil
  • 2 tablespoons molasses or honey
  • 275 ml tepid water
  • 2 tablespoons natural yoghurt (or soy yoghurt if dairy free
  • 4 large organic eggs

Sieve all dry ingredients (except yeast) into a mixing bowl and add the seeds. Give a good mix around to distribute everything.

Mix together the yeast, water, oil, molasses and yoghurt. Set aside for 5 minutes.

Whisk the eggs and add to the yeast mixture.

Using a dough hook or K beater, add the yeast mixture to the dry ingredients slowly. Then beat well for 5 minutes. The right mixture is quite wet and will resemble a very thick batter rather than a bread dough.

Put batter into an oiled loaf tin (I also put non stick baking paper on the bottom as it makes it much easier to get the bread out afterwards) and cover with damp parchment and a damp t towel and cover the lot with cling film. Sit in a warm area for 40 to 60 minutes. The bread should rise a little during this time.

Remove the cling, t towel and parchment and put into a preheated oven at 170C. Bake approximately 50 minutes or until cooked.

Leave to cool in the tin before turning out on to a wire rack to completely cool.

Enjoy !!!!

Next time I will share with you the recipe for a super quick oat and seed bread which is also delicious as well as being Wheat Free and Gluten Free (if you use Gluten Free Oats!)

SWEET POTATO GRANOLA

by April 23, 2018

This is a delicious and filling breakfast. The red berries are full of antioxidants. It also is a good source of protein with the natural yoghurt and chia seeds, together with the pumpkin and sunflower seeds, quinoa and nuts in the homemade granola. It also has sesame seeds in it, which are a very good source of calcium.

This is the granola I learnt to make in Maggie Lynch’s cooking class. It is so delicious that my first batch only lasted one week, as my son takes it into university with him as a snack.

Here is the recipe:

200g combined total comprising of: raw buckwheat grains (not toasted), quinoa flakes, millet flakes and/or jumbo oat flakes. (I used 100g jumbo oat flakes, 50g quinoa flakes and 50g millet flakes as that is what I had available). You can use whatever combination you like. Dont forget, for it to be Gluten free you would have to use Gluten free oats !!!

  • 4 tablespoons pumpkin seeds
  • 4 tablespoons sunflower seeds
  • 4 tablespoons sesame seeds
  • 2 teaspoons ground cinnamon
  • 200g roughly chopped Brazil nuts or almonds or hazelnuts or pecan nuts (I used 100g Brazil nuts and 100g almonds).
  • 3 tablespoons coconut oil
  • 250g cooked and pureed sweet potato (I roasted 2 medium sized sweet potatoes in the oven for approx 1 1/4 hours, then let them cool, peeled them and whizzed them with a handheld blender)
  • 4 tablespoons maple syrup

Mix all dry ingredients in a large bowl and then massage in the coconut oil, sweet potato and maple syrup until you get a wettish mixture. You can squeeze some of it into clusters to obtain a crunchier granola if you want. Transfer to a parchment lined baking tray and toast in the oven at 140 degrees for 35 to 40 minutes. (Depending on the oven it may take a little longer, mine took almost an hour until it had some brown bits). Stir occasionally to move it around and get it evenly tanned!! Remove from oven and allow it to cool.

Store in an airtight container for up to 3 – 4 weeks in the pantry or 6 – 8 weeks in the fridge. If it lasts that long !!!

COOKING COURSE – GLUTEN AND WHEAT FREE

by April 19, 2018

On Saturday I attended a course on Gluten and Wheat Free Cooking, given by Maggie Lynch of the IINH’s Taste Health Kitchen.

Maggie is full of enthusiasm and the atmosphere is relaxed and very friendly, and over the 5 hours or so, Maggie fits in so much, demonstrating the recipes but also giving lots of general cooking information.

During the course we sampled some of the smaller dishes Maggie made, but at the end we were presented with a feast of a lunch which we shared, sitting around the table chatting to everyone there.

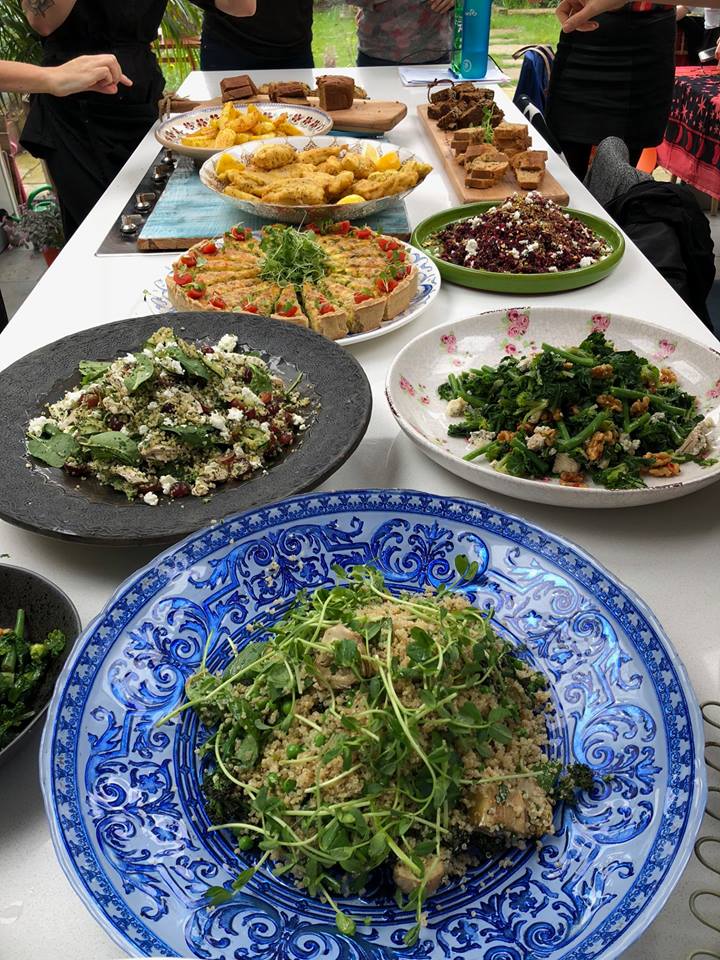
It was a really enjoyable way to spend the day whilst learning so much. I am attaching a link in case you might like to have a look and see what classes are coming up !

https://www.iinh.net/taste-health-cooking-classes/

The granola and bread photos from my previous post are from Maggie’s class, so I will share these recipes with you next time.

Here are photos of just some of the dishes we learnt how to make and shared for lunch.

THAI GREEN CURRY COURGETTE SOUP

by April 17, 2018

Here is my recipe for a very easy but tasty Thai Green Curry Courgette Soup.

In an ideal world you would make your own curry paste, but I did not have all the ingredients, so I used M&S’s Thai Green Curry Paste Shots. I always have some of these in the pantry as they are very useful for adding a bit of zing to dishes.

Saute two small red onions (or 1 large one) in a drizzle of coconut oil until transparent.

I then added three of the curry “shots” to the pan and cooked the paste until it was fragrant. I also added approx 1 tablespoon of fish sauce and let this cook for a couple of minutes.

Whilst this was cooking I grated 6 courgettes and then added these to the pan.

I let them saute and sweat for a little while then added 6 cloves of garlic crushed and one large piece of ginger (approx the size of two thumbs together) grated and let this cook gently for a minute or two.

Then I added 1 teaspoon of vegetable stock powder and 500 mls water. I brought this to the boil and then let it simmer for approx five minutes, just until the courgette was cooked.

I then added one bunch of spring onions finely sliced and cooked another two minutes.

I then added one tin of coconut milk and just let it come to a bubble on a low heat, then I turned it off the heat. Be careful when adding coconut milk to dishes not to let them boil away furiously, as the coconut milk can split.

You might need to add more water, but the courgette does release a lot of moisture, so wait and see at the end if you think it is too thick. Mine was good the way it was.

Finally give the soup a blitz with a hand blender – you can leave bits if you want or make it totally creamy.

To serve for lunch today, I gently reheated the soup and then added finely sliced batons of ginger and a sprinkling of coriander leaves. I ate it with a toasted piece of my gluten and wheat free yeast bread – which with the seeds and eggs in it provides me with my serving of protein.

BATCH COOKING

by April 16, 2018

Spent Sunday afternoon cooking for the week and weeks ahead. Made Black Bean Chilli, Beef Chilli (for the meat eaters), Thai Green Curry Courgette Soup, Gluten Free Bread and Home Made Granola.

With the two chilli dishes I have kept one portion of each for tonights dinner and have put the rest into containers for the freezer. This will give me four more meals of each for when I need something quick and easy.


The soup I will keep some for lunch for the next two days, and freeze the rest in portions. I will serve this with lots of fresh corriander and some ginger batons sprinkled on top.

Balanced Nutrition - Batch Soup

The bread we ate some for breakfast this morning (with poached eggs, avocado, whipped feta and sauted spinach) and the rest we will eat over the next couple of days. I would also freeze this in slices if I thought we would not get through it. Whilst preparing this batch of bread, I also portioned up all the dry ingredients for two more batches, which I will keep in the fridge, then next time I want to bake it, the process will be very easy as I only have to add the wet ingredients to the mix.

Balanced Nutrition - Batch Bread

The Granola will last in the fridge for 6 weeks and I will use this with fruit and yoghurt for breakfast.


Subscribe to our newsletter

Lorem ipsum dolor sit amet, consectetur adipiscing elit. Proin porttitor nisl nec ex consectetur, quis ornare sem molestie. 

Error: Contact form not found.

    Cart