Blog – Full Width

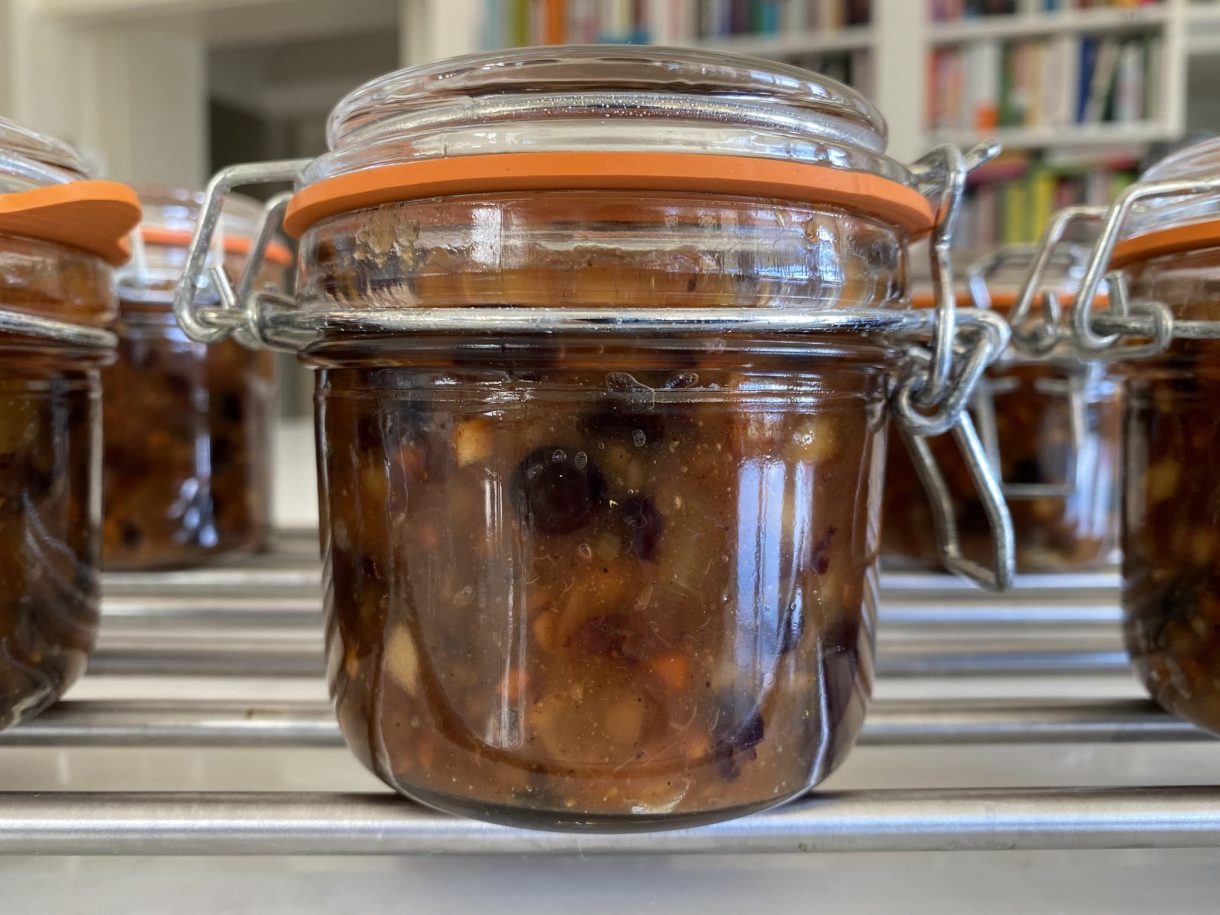
PEAR, APPLE AND GINGER MINCEMEAT

by November 6, 2020


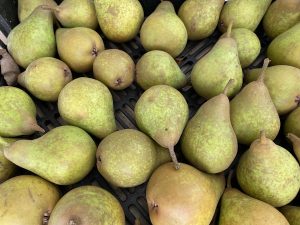
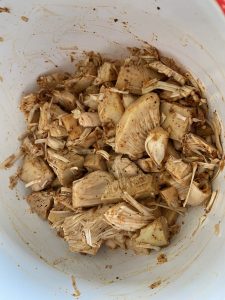
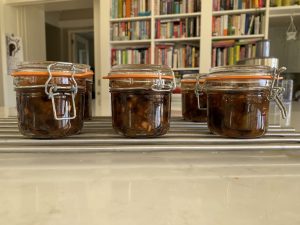
From this to this !!!!


I have lots of pears from my trees at the moment so I have been looking at ways in which I can use them.  I found this recipe for Pear, Apple and Ginger Mincemeat so thought I would use some to make this which I can then use to make Mince Pies and I will also give some away as presents.

This is a two day process!!!

You need sterilised jars to put the completed Mincemeat in, so google how to sterilise jars and pick the one that you feel most comfortable with.


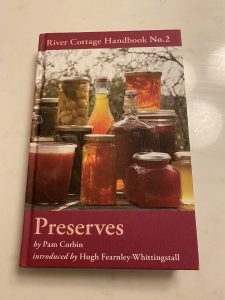
This recipe is a variation of a recipe from this book on Preserves, and I have to say it is a fantastic book.  I have used it lots of times and each recipe is well explained and easy to follow.


  • 1 kg Pears – peeled, cored and chopped into pieces
  • 2 large Oranges – zested and juiced (you need 200 mls of juice)
  • 500 g Apples – peeled, cored and diced into 1 cm cubes
  • 200 g Currants
  • 200 g Sultanas
  • 100 g Raisins
  • 100 g Crystallised Ginger
  • 100 g Orange Marmalade
  • 250 g Demerara Sugar
  • 1/2 teaspoon ground Cloves
  • 2 teaspooons ground Ginger
  • 1/2 Nutmet – grated
  • 100 g chopped Almonds
  • 50 mls Brandy


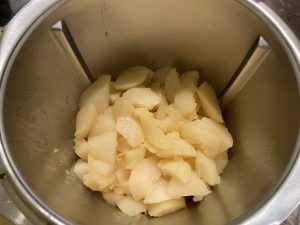
Place the Pears in the Orange Juice and cook until the Pears are tender.   Blend to a puree – you want 700 mls of puree.

In a large bowl, add all the other ingredients except the Brandy and mix well.  Add the pureed Pears and mix thoroughly.  Cover and leave to stand for 12 hours.


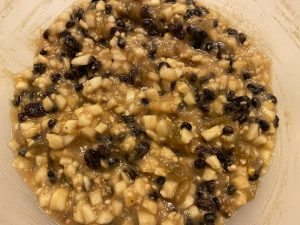
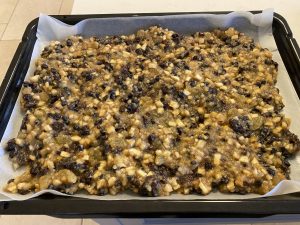
Preheat oven to 130 degrees.  Put the Mincemeat in a large baking dish and bake uncovered for 1 1/4 hours.


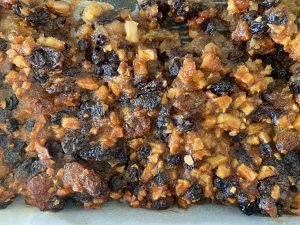
Put back into a mixing bowl and add the Brandy.  Mix thorougly.

Put into your warm sterilised jars, making sure there are no air pockets.  Seal and leave to cool.  Store in a cool dark place.

Use within 12 months.

JACKFRUIT TACOS

by November 6, 2020

This recipe for Vegan Tacos is really tasty.  I have never cooked with Jackfruit before so was interested to see what it would be like.  I actually really liked it, it gives a meaty texture to the dish.

I used the recipe from “The Wicked Healthy Cookbook” for the preparation of the Jackfruit, but then changed the accompaniments to what we like to eat.

There are a few stages to cooking the Jackfruit, but I think it was worth the effort.   You need to marinate the Jackfruit, so you need to prepare this step in advance.

For the Jackfruit and Spice Rub:

  • 2 tins of Jackfruit in water – drained and rinsed
  • 3 cloves of Garlic – crushed
  • 1/2 teaspoon Paprika
  • 1/2 granulated Black Pepper
  • 1/4 teaspoon ground Chipotle Chilli
  • 1/4 teaspoon ground Coriander
  • 1/4 teaspoon ground Cinnamon
  • Sea Salt to taste

Braising Liquid:

  • 2 1/2 tablespoons Olive Oil
  • 1 medium Onion – diced
  • 1 cup Vegetable Stock
  • 1/4 cup Orange Juice
  • Juice of 1 Lime
  • 2 tablespoons Maple Syrup
  • 1 1/2 teaspoons finely sliced Fresh Oregano
  • 2 Bay Leaves
  • 1 Chipotle Chile in Adobo Sauce – finely chopped

Accompaniments:

  • Soft Corn Tortillas
  • Guacomale – recipe on website
  • Quick and Easy Salsa – recipe on website
  • Finely sliced Cabbage – for the crunch factor
  • Pickled Red Onion – recipe on website
  • Coriander Leaves
  • Limes cut into wedges

SPICE RUB:


Cut the inner cores from the drained Jackfruit and cut these cores into strips.  Take any large seeds out.  The other parts of the Jackfruit will shred.

Mix together the Garlic, Paprika, Granulated Onion, Black Pepper, Chipotle Chilli, Coriander, Cinnamon and Salt.  Sprinkle the Spice Rub over the Jackfruit and mix together, roughly shredding the Jackfruit.  Whilst you are doing this, more large seeds might appear, so take them out.

Let marinate in the fridge for at least an hour, or up to overnight.


BRAISING LIQUID:

Heat a shallow pot over medium high heat.  Add the Oil then the Onion and saute until the Onion is golden.

Add the Jackfruit and stir until it begins to stick to the pan, approximately 3 minutes.

Add the stock, stirring to deglaze the pan.

Stir in the Orange Juice, Lime Juice, Maple Syrup, Oregano, Bay Leaves and Chipotle.

Bring to a simmer, breaking up the Jackfruit with a potato masher or fork.  Reduce heat to medium low, cover and cook until most of the liquid has reduced to a sauce that coats the Jackfruit – approximately 25 minutes.  Stir frequently to prevent sticking and to continue to break the Jackfruit up into shreds.


ASSEMBLY:

Serve the Jackfruit mix on the warmed Tortillas and add your accompaniments as your tastebuds dictate!!!!


TOFU STEAK

by November 6, 2020

I have made this Tofu Steak a couple of times and I really love it.

I serve it with a bowl of Miso Soup.

The recipe is from the cookbook “Everyday Harumi”, although I have reduced the amount of soy sauce in the sauce recipe as originally I found it too salty.

  • 100 ml Mirin
  • 150 ml Tamari (Gluten Free Soy Sauce – the original recipe was 300 ml)
  • 10 cm piece of Konbu seaweed, wiped of any salty !!


  • 600 g soft/silken tofu – cut into slices (sort of  fish finger shape)
  • Freshly Ground Black Pepper
  • 1 tablespoon grated Garlic
  • 25 g fresh Ginger – grated
  • 50 g Spring Onions – finely sliced
  • 5 tablespoons Potato Starch
  • Sunflower oil for frying
  • Katsuobushi – dried fish flakes for garnish


First make the Banno Soy Sauce:

In a small saucepan bring the Mirin to the boil, reduce the heat to low and cook for 3 minutes to burn off the alcohol.  Remove from the heat, add the Tamari and Konbu.  Leave to cool then put in the fridge.


Carefully dry the pieces of Tofu with paper towel.  You need to be very careful with the Tofu as it breaks very easily.

Season the Tofu with Pepper, then spread one side of the tofu with the grated Garlic.

Lightly coat the Tofu pieces in the Potato Starch.

Heat the oil in the frying pan and when hot add the Tofu, cooking until it is crispy and brown on both sides.


Serve with the grated Ginger, sliced Spring Onions and Katsuobushi on top.

Serve with the Banno Soy Sauce.

Yum !!!!!


SWEET POTATO, FETA AND BULGUR WHEAT SALAD

by November 6, 2020

I made this very tasty salad for dinner during the week, it is easy to make and full of delicious flavours.

It has lots of Parsley, and Parsley is an excellent source of Vitamin K, Vitamin C, Vitamin A, Folate and Iron.

If you wanted to make it Gluten Free, you could use Quinoa or even Brown Rice instead of the Bulgur Wheat.

This is based on a Rachel Allen recipe which was in the Sunday Independent last week.  I changed it slightly to suit our tastebuds, so here is how I made it.

  • 2 large Sweet Potatoes – peeled and cut into small pieces
  • 1 big blob of Coconut Oil
  • 100 g Bulgur Wheat – rinsed and drained (see Gluten Free options)
  • 400 ml water with Vegetable Stock or already prepared Vegetable Stock
  • Juice of 2 Lemons
  • 1 tablespoon of Extra Virgin Olive Oil
  • 1 big bunch of Parsley (leaves only) – chopped
  • 1 big bunch of Mint (leaves only) – chopped
  • 1 bunch Spring Onions – finely sliced
  • 4 ripe Tomatoes – deseeded and finely diced
  • 1/3 Cucumber – finely diced
  • 1 block of Feta Cheese – diced
  • Freshly Ground Black Pepper

Firstly, cook your Sweet Potato.   I have a dry air fryer, so I cook mine in that for 35 minutes in a blob of Coconut Oil.  You can also just roast the Sweet Potato pieces in the Coconut Oil in the oven,  180 degrees,  for approx 40 minutes, or until they are cooked through and nicely browned around the edges.

Now cook your Bulgur Wheat.  Bring your Water/Stock to the boil and add your Bulgur Wheat.  Stir it around, cover with a lid and reduce the heat to low and cook for 15 minutes – most of the water will have been absorbed.  Remove from the heat, drain off any excess water and let sit for 10 minutes.   Separate the grains with a fork.

Add half the Lemon Juice and the Extra Virgin Olive Oil to the Bulgur Wheat and mix in.


In a bowl, add your Parsley, Mint, Spring Onions, Tomatoes and Cucumber.  Add some freshly Ground Black Pepper and mix through.

Add your Bulgur Wheat to the salad ingredients and with the extra Lemon Juice and mix around.

Add your cooked Sweet Potato and your Feta Cheese, and carefully stir through.


This delicious salad would go with so many other things, we ate ours with some marinated roasted Chicken Thighs, but it would be equally delicious as part of a vegetarian meal with some Humous or Baba Ganoush on the side.

We ate the rest of it for lunch the next day and it was equally delicious, as the flavours had really developed throughout the salad.


MISO SOUP

by October 25, 2020

Over lockdown last time I made Miso Soup as part of a Japanese Feast, but it was way too salty.  So I decided I had to do a “redemption” (Australia MasterChef phrase used all the time!!!)  Miso Soup – and this time it was perfect.

I still have some packets of Dashi which I purchased when we were in Japan this time last year, so was able to use that as the base of my soup.  I am sure good Asian Supermarkets would sell these or you could get them online.  Dashi is a stock which gives Japanese food its rich, umami-packed savory flavor.  It is generally made from Kombu which is a dried Kelp and Katsuobushi which are dried Bonito flakes.  A vegetarian version can also be made using Dried Shiitaki Mushrooms.

This cooks really quickly, so you need to have all your preparation done so you can add things quickly.

This quantity made three good sized bowls of Soup!!!


  • 1 1/2 Tablespoons of Miso Paste – I used a red Miso
  • 1 Litre of Dashi
  • 1 Tablespoon Mirin
  • 1 bunch Spring Onions – cut into thin slices
  • 2 Tablespoons Dried Wakame (seaweed – or you could use Spinach but the texture will be different)
  • 2 bunches of Asparagus – cut into pieces roughly 1 1/2 inches long
  • 1 strip of Lemon Peel using a vegetable peeler to peel once down the lemon –  cut into very fine strips across the strip
  • 1 block of Silken Tofu, cut into bite size cubes – I open the Tofu and rest it on some paper towel whilst I am cooking the rest of the soup to get any excess moisture out off it
  • Toasted Sesame Seeds

Combine the Miso, Dashi and Mirin in a saucepan and bring to a simmer.

Add the Spring Onions.

Add the Wakame and cook for a minute.

Add your Asparagus and cook for a further minute.

Remove from the heat and add your Lemon Peel.

Divide the Tofu between your bowls and gently ladle over your Miso Soup.

Sprinkle the Sesame Seeds on Top.


Happy Slurping !!!

COURGETTE AND LEMON RISOTTO

by October 25, 2020

This Courgette and Lemon Risotto is light and tasty – perfect for a cold Autumn evening !!!   It is Gluten Free and Vegan and Dairy Free (if you don’t add any grated Parmesan at the end).  The addition of Lemon Zest and Juice gives it a lovely fresh tang.

  • 1 Onion – finely chopped
  • 2 Garlic Cloves – crushed
  • 1 Litre Vegetable Stock
  • 175g Risotto Rice
  • 200 ml  White wine
  • 3 large Courgettes – finely diced
  • 1 Lemon – zest and juice
  • Bunch of Basil Leaves
  • 3 Tablespoons of Olive Oil
  • Sea Salt and Freshly Ground Black Pepper
  • Parmesan Cheese to serve if you want!


Firstly, heat your oil in a large frying pan (the pan you will cook your Risotto in) and when it is hot add your diced Courgettes.  Let them brown nicely and then set aside on some paper towel to absorb any excess oil.


There will be left over oil in the pan, so add your onion to this and cook until it has softened.

Have your stock ready in a saucepan on a low heat to keep it just simmering.

Add your Crushed Garlic to the Onion, and stir for a minute.

Add your Risotto Rice to the pan, and stir it around so it is covered in the lovely Onion, Garlic and Oil mixture.

Add the White Wine and allow it to bubble away, stirring regularly.

Once most of the White Wine has gone, add a ladle of the hot Vegetable Stock and continue to stir.  Risotto requires constant stirring!!!  You may end up needing more or less stock to cook the rice to your satisfaction.

Keep adding the stock one ladle at a time, until the rice is cooked how you like it and the consistency is how you like it.  I don’t like mine too dry, preferring a juicy texture.

Add back into your pan your Courgette, the Lemon Zest and the Lemon Juice.

Stir to combine.

Taste for seasoning, you may not need much salt as Stock can be salty, so always check first before adding salt.  A good grinding of Black Pepper is always a good addition though!

Serve with your finely sliced Basil Leaves and some freshly grated Parmesan Cheese, which you can then stir through.

Enjoy – I like it with a Rocket Salad with Balsamic Vinegar Dressing.


Subscribe to our newsletter

Lorem ipsum dolor sit amet, consectetur adipiscing elit. Proin porttitor nisl nec ex consectetur, quis ornare sem molestie. Sed suscipit sollicitudin nulla tempor congue. Integer sed elementum odio.

Error: Contact form not found.

    Cart